Forcing A or AAAA record resolution with CoreDNS

·690 words·4 mins

Some devices will favour IPv6 when configured, which is great, however there are sometimes that you want a device to only resolve either the v4 or v6 addresses. In this case it was for ICMP monitoring of remote devices. The device doing the monitoring will favour IPv6 over IPv4, which is great, however I want to be able to monitor both.

CoreDNS is the DNS server which I use for serving up internal DNS, so I was looking for a way to use this to perform the forcing of records.

I went back and forth on ways to do this, templates, different forwardings based on domain and so on, however I ended up using the rewrite to acheive this.

An example Corefile would be as follows (with my other configuration removed)

(bind) {
  bind 127.0.0.1
  bind 127.0.0.53
  bind ::1
  bind 192.168.1.2
}
a:53 {
  import bind
  rewrite continue { name regex (.*)\.a {1} answer auto }
  rewrite continue { type AAAA A }
  forward . 8.8.8.8
}
aaaa:53 {
  import bind
  rewrite continue { name regex (.*)\.aaaa {1} answer auto }
  rewrite continue { type A AAAA }
  forward . 8.8.8.8
}
.:53 {
  import bind
  forward . 1.1.1.1
}

This configuration listens on 3 different zones.

  1. The .:53 stanza will configure CoreDNS to forward any query received on one of the bound IPs (as per the bind template at the top of the file) to 1.1.1.1.

  2. The a:53 stanza will reqrite any query that ends .a and will strip the .a from the end for the forwarded query, and re-add on the inbound. This will also rewrite CNAME records to be the ‘correct’ type. The next rewrite is to Force any AAAA requests to be rewritten to A requests. It then forwards on to 8.8.8.8.

  3. The aaaa:53 stanza does the sames as #2 does, but for AAAA records.

By pushing queries through this, its possible to force devices that have no other way to force v4 / v6 resolution to resolve whichever is prefered.

  • Testing an .A record
~ % dig icanhazip.com.a @192.168.1.2 -t AAAA

; <<>> DiG 9.10.6 <<>> icanhazip.com.a @192.168.1.2
;; global options: +cmd
;; Got answer:
;; ->>HEADER<<- opcode: QUERY, status: NOERROR, id: 32139
;; flags: qr rd ra; QUERY: 1, ANSWER: 2, AUTHORITY: 0, ADDITIONAL: 1

;; OPT PSEUDOSECTION:
; EDNS: version: 0, flags:; udp: 4096
;; QUESTION SECTION:
;icanhazip.com.a.		IN	AAAA

;; ANSWER SECTION:
icanhazip.com.a.	92	IN	A	104.18.114.97
icanhazip.com.a.	92	IN	A	104.18.115.97

;; Query time: 19 msec
;; SERVER: 192.168.1.2#53(192.168.1.2)
;; WHEN: Sun Nov 06 12:42:08 EST 2022
;; MSG SIZE  rcvd: 106
  • Testing an AAAA record being forced
~ % dig icanhazip.com.aaaa @192.168.1.2 -t A

; <<>> DiG 9.10.6 <<>> icanhazip.com.aaaa @192.168.1.2
;; global options: +cmd
;; Got answer:
;; ->>HEADER<<- opcode: QUERY, status: NOERROR, id: 28438
;; flags: qr rd ra; QUERY: 1, ANSWER: 2, AUTHORITY: 0, ADDITIONAL: 1

;; OPT PSEUDOSECTION:
; EDNS: version: 0, flags:; udp: 4096
;; QUESTION SECTION:
;icanhazip.com.aaaa.		IN	A

;; ANSWER SECTION:
icanhazip.com.aaaa.	30	IN	AAAA	2606:4700::6812:7361
icanhazip.com.aaaa.	30	IN	AAAA	2606:4700::6812:7261

;; Query time: 97 msec
;; SERVER: 192.168.1.2#53(192.168.1.2)
;; WHEN: Sun Nov 06 12:42:13 EST 2022
;; MSG SIZE  rcvd: 139
  • Testing without specifying
~ % dig icanhazip.com @192.168.1.2

; <<>> DiG 9.10.6 <<>> icanhazip.com @192.168.1.2
;; global options: +cmd
;; Got answer:
;; ->>HEADER<<- opcode: QUERY, status: NOERROR, id: 28423
;; flags: qr rd ra; QUERY: 1, ANSWER: 2, AUTHORITY: 13, ADDITIONAL: 1

;; OPT PSEUDOSECTION:
; EDNS: version: 0, flags:; udp: 4096
;; QUESTION SECTION:
;icanhazip.com.			IN	A

;; ANSWER SECTION:
icanhazip.com.		21	IN	A	104.18.115.97
icanhazip.com.		21	IN	A	104.18.114.97

;; AUTHORITY SECTION:
.			42144	IN	NS	b.root-servers.net.
.			42144	IN	NS	i.root-servers.net.
.			42144	IN	NS	m.root-servers.net.
.			42144	IN	NS	h.root-servers.net.
.			42144	IN	NS	c.root-servers.net.
.			42144	IN	NS	k.root-servers.net.
.			42144	IN	NS	f.root-servers.net.
.			42144	IN	NS	g.root-servers.net.
.			42144	IN	NS	j.root-servers.net.
.			42144	IN	NS	e.root-servers.net.
.			42144	IN	NS	l.root-servers.net.
.			42144	IN	NS	d.root-servers.net.
.			42144	IN	NS	a.root-servers.net.

;; Query time: 8 msec
;; SERVER: 192.168.1.2#53(192.168.1.2)
;; WHEN: Sun Nov 06 12:42:17 EST 2022
;; MSG SIZE  rcvd: 503


LLDP on Intel X710 Network Cards

·243 words·2 mins

It’s sometimes useful to be able to match ports on a system to those on a switch from both sides. Security concerns aside for a moment, this can be done using one of the many link layer protocols, CDP and LLDP being examples of this. On a linux system lldpd is a good lightweight utility that handles the LLDP PDUs from the switch, and sends out its own.

However, some network cards will make the frames sent ‘disapear’ and just make the ones receive disapear into the ether from the perspective of the OS.

Intel’s X700 range of cards does this. It’s part of the ‘data centre bridging’ support that the card has, and whilst this may be useful for DCB/DCBx, in most situations this can cause a bit of pain.

On older linux systems, using debugfs you can disable the LLDP Firmware Agent, however modern versions, or at least those with a >3.10 kernel, and a modern ethtool, can use the ethtool command to set a flag to be enabled, which disables the agent.

ethtool --set-priv-flags INTERFACE disable-fw-lldp on

You can confirm this is working using ethtool --show-priv-flags INTERFACE

To set this on every boot, a tool like udev is likley to work best, in a udev rules file, for example, /etc/udev/rules.d/99-net-disable-fw-lldp.rules

# Intel x710's have a firmware LLDP agent, it sends incorrect LLDP packets, and stops the OS from receiving them. Disabling
ACTION=="add", SUBSYSTEM=="net", ENV{INTERFACE}=="*", DRIVERS=="i40e", PROGRAM="/usr/sbin/ethtool --set-priv-flags $name disable-fw-lldp on"


A brief overview of OpenHAB

·1490 words·7 mins

What is Openhab? #

OpenHAB is a Java based home automation system that allows you to control multiple technologies all from a single location. It is built on the principal of a single “Home automation Bus” where different technologies communicate using a common “Event bus”.

This means that you are able, on any device that can run the JVM, you can run your home automation, without the need to purchase expensive controllers, however, with OpenHAB manual work is required to get the system working, as “batteries are not included”.

OpenHAB is OpenSource which means that the community as a whole are able to fix bugs, and unlike Cloud based services, or propitiatory controllers, you do not need to rely on the company (or in this case, team of people) to still be around to do feature improvements, the community as a whole can do so.

What can OpenHAB connect to? #

OpenHAB has a plethora of addons that are available, ranging from HomeAutomation protocols (such as ZWave, EnOcean, RFXCOM (Lightwave RF can be controlled using this)). Some consumer devices are also able to be integrated (Sonos, Samsung TVs, LG TVs) It also has the ability to integrate with various notification systems including EMail,XMPP (Jabber / Google Talk), NotifyMyAndorid. It can also integrate with Calendaring systems like Google Calendar

Lets dive in! #

For the examples that we’re going to use in the this document we will use ZWave based equipment

The hardware that will be in use is as follows

Initial Setup of OpenHAB #

As OpenHAB doesn’t have an installer it has to be installed by hand. We’re going to do this into /opt

# Create directory structure
cd /opt
mkdir /opt/openhab /opt/oh-addons-dist

# Download Runtime
curl -LO https://bintray.com/artifact/download/openhab/bin/distribution-1.7.0-runtime.zip

# Download Addons
curl -LO https://bintray.com/artifact/download/openhab/bin/distribution-1.7.0-addons.zip

# Unzip app
cd /opt/openhab
unzip /opt/*runtime.zip

# Unzip addons
cd /opt/oh-addons-dist
unzip /opt/*addons.zip

Installation of Addons #

We’re going to copy the addons mentioned above into place

cd /opt/openhab/addons

mv /opt/oh-addons-dist/org.openhab.persistence.rrd4j-1.7.0.jar /opt/openhab/addons/

Installation of HABMIN #

OpenHAB does not provide a WebUI for administration so we’re going to install a community project called HABMin to provide us this

# Install habmin
cd /opt/openhab/addons
curl -Lo org.openhab.io.habmin-1.7.0.jar https://github.com/cdjackson/HABmin/blob/master/addons/org.openhab.io.habmin-1.7.0-SNAPSHOT.jar?raw=true
curl -Lo org.openhab.binding.zave-1.7.0.jar https://github.com/cdjackson/HABmin/blob/master/addons/org.openhab.binding.zwave-1.7.0-SNAPSHOT.jar?raw=true
cd /opt/openhab/webapps/
curl -Lo /opt/openhab/webapps/habmin.zip https://github.com/cdjackson/HABmin/archive/master.zip
unzip habmin.zip
mv HABmin-master/ habmin

Configuration of OpenHAB #

At this point we have OpenHAB installed, we now however need to provide it a Configuration file, which should be in /opt/openhab/configurations//openhab.cfg

You will need to use your favourite Text Editor (vi, nano, emacs) to edit this file

zwave:port = /dev/ttyACM0
zwave:healtime = 2
zwave:masterController = true
tcp:refreshinterval=250
folder:items=10,items
folder:sitemaps=10,sitemap
folder:rules=10,rules
folder:scripts=10,script
folder:persistence=10,persist
security:option=OFF
persistence:default=rrd4j
mainconfig:refresh=60
chart:provider=default
logging:pattern=%date{ISO8601} – %-25logger: %msg%n

In this file we’ve set the ZWave controller to be the first ACM device (/dev/ttyACM0), if you don’t have any 3g Modules or other ZWave controllers plugged into this machine this will (likely) be the device you would need to use.

We are also disabling security for the purpose of this demo, you may want to enable this going forward!

Starting OpenHAB #

This is done using the start.sh script /opt/openhab/start.sh

Setup of ZWave Devices #

We’re going to use HABMin to handle the inclusion of devices into the network.

  • Open a webbrowser to the machines IP address into the /habmin/ folder. For instance if this is 1.2.3.4 the address you would go to is http://1.2.3.4/habmin/
  • Click the Configuration tab.
  • Click Bindings (Bottom Left corner)
  • Click the ZWave binding
  • Click the Devices Tab

For each device you wish to add, click the include button and follow the instructions for the device to include it into the network.

Once this is completed the Devices tab should show the list of devices, similar to below (be aware this has more devices that we’re going to look at configuring!)

Persistence #

It is useful to be able to see what an item’s previous value has been, and as such we want to store these so that they survive over restarts. We’re going to use the rrd4j addon for this. It is configured by putting the following in /opt/openhab/configurations/persistence/rrd4j.persist

// persistence strategies have a name and a definition and are referred to in the “Items” section

Strategies {
 everyHour : “0 0 * * * ?”
 everyDay : “0 0 0 * * ?”
 everyMinute : “0 * * * * ?”

 // if no strategy is specified for an item entry below, the default list will be used
 default = everyChange
}

/*
 * Each line in this section defines for which item(s) which strategy(ies) should be applied.
 * You can list single items, use “\*” for all items or “groupitem\*” for all members of a group
 * item (excl. the group item itself).
 */

Items {
 // persist all items once a day and on every change and restore them from the db at startup
 * : strategy = everyChange, everyMinute, everyDay, restoreOnStartup
}

Items #

In OpenHAB an item is a individual attribute of a device that is configured within OpenHAB.

The first set of Items we will configure is the AeonLabs multi Sesnsor

We need to create a file in /opt/openhab/configurations/items/. Lets create /opt/openhab/configurations/items/livingroom.items

Within this file we define a set of items

Number sensor_1_temp “Temperature [%.1f °C]” {zwave=”3:command=sensor_multilevel,sensor_type=1″} 
Number sensor_1_humidity “Humidity [%.0f %%]” {zwave=”3:command=sensor_multilevel,sensor_type=5”}
Number sensor_1_luminance “Luminance [%.0f Lux]” {zwave=”3:command=sensor_multilevel,sensor_type=3”}
Contact sensor_1_motion “Motion [%s]” {zwave=”3:command=sensor_binary”}
Number sensor_1_battery “Battery [%s %%]” {zwave=”3:command=battery”}

The format of these files is as follows

ItemType ItemName ItemLabel <ItemIcon> (ItemGroup) {ItemBinding}

We are not going to cover off Icons or Groups in this guide.

The ItemTypes that are available are

  • Color
  • Contact
  • DateTime
  • Dimmer
  • Group
  • Number
  • RollerShutter
  • String
  • Switch

The ItemLabel has the ability to be formatted using standard Java formatter syntax, which will not be covered here other than to say [%.1f °C] will display the temperature to 1 decimal point, ie 23.4.

The Binding is where we configure which device we actually are querying. In this example I’m using ZWave Node 3. We specify the command class that needs be be used, for instance SENSOR_MULTILEVEL and then the sensor type, this is documented at https://github.com/openhab/openhab/wiki/Z-Wave-Binding

When this file is saved, you should now be able to see the items in HABMin under Configuration -> Items and Groups

The next devices we will configure are the NorthQ meters. These can be placed in any filename in the items directory. Lets create them as power.items

Group Power <energy>
Number power_1_battery “Electricity Meter Battery [%s %%]” <battery> (Power) {zwave=”4:command=BATTERY,refresh_interval=3600″}
Number power_1_usage_total “KWH [%s]” (Power) {zwave=”4:command=METER,meter_scale=E_KWh,refresh_interval=450″}
Number power_1_usage “Watt [%.2f]” (Power)

Lets put the gas in gas.items

Group Gas
Number gas_1_battery “Gas Meter Battery [%s %%]” (Gas) {zwave=”6:command=BATTERY,refresh_interval=3600″}
Number gas_1_usage_total “m3 [%s]” (Gas) {zwave=”6:command=METER,refresh_interval=450″}
Number gas_1_usage “m3 [%.2f]” (Gas)

You will notice that we have a power_1_usage and gas_1_usage item that does not have a binding. We’ll look at this in a few moments

Our final set of items that we want to create are for the Qubino Relay. Lets create this in relay.items

Switch light1_state “light1 [%s]” {zwave=”10:command=switch_binary”}
Number light1_power “light1 Watt [%s]” {zwave=”10:command=meter,refresh_interval=60″}

Rules #

Rules allow you to create logic within the OpenHAB system, for instance when there is movement, turn on the light.

We’re going to create two rules, one for our gas meter and one for our power meter.

Both of these devices will, by default, only return the amount of power or gas used since they were installed, but I find it more interesting / useful to have a “point in time” amount that is being used.

Create the file /opt/openhab/configuration/rules/northq.rules

rule gas1_current_usage_update
 when
 // When power meter is updated
 Item gas_1_usage_total received update
 then
 // Update current usage with the difference between this, and the previous update to get our spot usage of m3.
   gas_1_usage.postUpdate(
     gas_1_usage_total.deltaSince(now.minusMinutes(5)).value
   )
 );
 end

rule power1_current_usage_update
 when
 // When power meter is updated
 Item power_1_usage_total received update
 then
 // Update current usage with the difference between this, and the previous update and multiply by 1000 to give us the total in watts.
   power_1_usage.postUpdate(
     power_1_usage_total.deltaSince(now.minusMinutes(5)).value * 1000
   )
 );
 end

These rules simply take the last value that the usage total was 5 minutes ago, and sets the usage to the difference between the two readings

Sitemaps #

Sitemaps provide us a way to display items on a device, such as within OpenHAB’s applications or on the web page.

They can get quite complex and as such I’m not going to cover them off in details, but a sample sitemap would be /opt/openhab/configuration/sitemap/default.xml

sitemap default label=”Home”
{
 Frame label=”Hallway” {
   Switch item=light1_state
   Text item=light1_power
 }

 Frame label=”Sensor1″ {
   Text item=sensor_1_temp valuecolor=[&gt;25=”orange”,&gt;15=”green”,&gt;5=”orange”,&lt;=5=”blue”] {
   Text item=sensor_1_humidity
   Text item=sensor_1_luminance
   Text item=sensor_1_battery
   Text item=sensor_1_motion
 }

 Frame label=”Energy” {
   Text item=power_1_usage label=”Power usage [%.0f Watts]” icon=”energy”
   Chart item=power_1_usage period=h refresh=6000
   Text item=power_1_battery
   Text item=gas_1_usage label=”Gas usage [%.2f m3]” icon=”fire-on”
   Chart item=gas_1_usage period=h refresh=6000
   Text item=gas_1_battery
 }
}


On the fly content replacement using F5 Load balancers

·775 words·4 mins

In the modern web application world, a large proportion of sites are using SSL Offloading, be this for the added security of the web servers not having the SSL private key on them (and hence if compromised the certificate is not necessarily compromised as well) or for the performance boost associated of using hardware accelerators. This however is a double-edged sword. Its more complex for developers to test their applications against this behavior, as they need to either setup two webservers (or vhosts with proxying) on the same host to emulate this, or they need to have an actual off loading device. Both of these are not always readily available options, or easy for the development team to do.

With this in mind, I have seen many times applications that “work in development” but don’t work in production. One common issue I’ve seen is developers checking the protocol that the user has connected to the server as. When off loading, this will be HTTP, rather than HTTPS. It’s also a common practice to run SSL sites on a different port, lets say port 8080, however if the developer is using the absolute URL of the server including the port number when creating URLs this can cause issues.

The result is a url like https://www.withagrainofsalt.co.uk becomes http://web123.internal:8080/. The end user is unable to get access to this (usually) and the user experience is less than idea. The correct way to fix this would be in the application its self, however this can sometimes take weeks / months, and there may not be budget allocated to fix this defect.

With this in mind, we look to other places in the infrastructure that we would be able to fix this issue. My personal preferences are

I’ve also been informed that you can do this with

In the case of my most recent requirement, the customer was unable to edit the application, there was no budget for Ape. The customer did however have an F5 in front of their web site.

iRule, iRock #

F5 Load balancers have a TCL based scripting language that can be invoked on every request that passes through them. Due to the customer needing to do some re-writes, I got to work and crafted an iRule as below. Please be aware that you must have a STREAM profile attached to the virtual server to use this!

when RULE_INIT {
	set static::stream_replace_debug 1
}

when HTTP_REQUEST {
   # Disable Stream profile by default
   STREAM::disable
}
when HTTP_RESPONSE {  
   # If response is mime time text/* 
   if { [HTTP::header value Content-Type] contains "text" } {
		if { $static::stream_replace_debug } { 	log local0. "[IP::client_addr]:[TCP::client_port]: MIME type matches. Enabling STREAM profile"	}
		# Match on http://something.something.something.something:81/ and replace it with ""
		STREAM::expression {@http://(\S+\.?){1,}:8081/@@}
		# Enable stream profile  
		STREAM::enable  
   }
}

when STREAM_MATCHED {  
	# Replace http:// with http:s// and Strip port number
	STREAM::replace "[string map {http:// https:// :8081 ""} [STREAM::match]]"
    if {$static::stream_replace_debug} { log local0. "[IP::client_addr]:[TCP::local_port]: matched: [STREAM::match], replaced with: [string map {http:// https:// :8081 ""} [STREAM::match]]"  }
}

Breaking this down we have events triggering specific blocks of code

RULE_INIT #

This is triggered when the iRule is added to a virtual server or edited

In our example we’re performing a simple set of variable, enabling debug (set this to 0 in production!)

HTTP_REQUEST #

This is the event triggered when an HTTP request from the client hits the load balancer.

We disable the stream profile at this point

HTTP_RESPONSE #

This code block gets fired off when the server is replying

In our code we first check to see that the Content-Type header contains text, as this would be pointless to perform on graphics! If it is we perform the next step. If debug is enabled, we log the client IP and port to the LTM log. We set the expression that the STREAM profile will use to http://:8081/, and then enable the stream profile. If we did not see a Content-Type header contain text, we do nothing

STREAM_MATCHED #

We see this code block get executed when the STREAM profile’s expression is matched.

We simply perform a string replacement swapping http:// for https:// and :8081 for a blank string, and log this if debug is enabled.

Conclusion #

This does have a hit to the CPU on the load balancer, so this should be used sparingly. As mentioned above you MUST have a stream profile associated with the virtual server before applying this iRule


Outbound filtering of Web requests using Squid as a Proxy server

·1947 words·10 mins

Frequently in my line of work I’ll be asked about filtering of outbound traffic from application servers. There are two schools of thought here, one is that an app server can have unfiltered access to the internet, and the other that the app server should have as little access to any resources (both inside and outside of the solution) as needed to preform its role.

This generally isn’t an issue if site to site VPNs, static IPs or similar are being used on the destination side. But what happens if your application requires access to something like Youtube, Facebook or Flickr. As these cloud services are not managed by the customer, we have no idea if they are on static IP addresses (and in the case of flickr, they do seem to change moderately frequently).

With this in mind a traditional Layer3/Layer4 firewall is only going to be able to handle this if it supports DNS resolution in its access-list set, and unfortunately (but for good reason) this is not a common feature. Cisco did introduce this to the ASA firewalls in 8.4, however I personally have not used this, so at the moment its still a bit of an unknown and I can’t recommend it to a customer.

There is however another way of doing this, whilst it might not be a perfect situation, it does at least allow you to filter outbound traffic.

The Squid proxy server has been around for quite some time and is quite a stable product, both in the forward (outbound) and reverse (inbound) HTTP proxy space. We’re going to use this to preform our outbound proxying. It is possible to use commercial products like a BlueCoat proxy, however I’m going to concentrate on the FOSS solution here.

Prerequisites #

Before we start we need to have the following:

  • A Linux Server (for this example I’m going to be using CentOS 6.4, however any linux distribution should work)

Installing Squid #

This is a really simple task on most linux distributions, as not only has squid been since the early 90’s, it’s also really popular! You can use the package manager to install squid on most distributions

yum install -y squid

You should get a response similar to below:

Loaded plugins: fastestmirror
Loading mirror speeds from cached hostfile
Setting up Install Process
Resolving Dependencies
--> Running transaction check
---> Package squid.x86_64 7:3.1.10-18.el6_4 will be installed
--> Processing Dependency: perl(DBI) for package: 7:squid-3.1.10-18.el6_4.x86_64
--> Processing Dependency: libltdl.so.7()(64bit) for package: 7:squid-3.1.10-18.el6_4.x86_64
--> Running transaction check
---> Package libtool-ltdl.x86_64 0:2.2.6-15.5.el6 will be installed
---> Package perl-DBI.x86_64 0:1.609-4.el6 will be installed
--> Finished Dependency Resolution

Dependencies Resolved

=====================================================================================================================================================================================================
 Package                                          Arch                                       Version                                               Repository                                   Size
=====================================================================================================================================================================================================
Installing:
 squid                                            x86_64                                     7:3.1.10-18.el6_4                                     updates                                     1.7 M
Installing for dependencies:
 libtool-ltdl                                     x86_64                                     2.2.6-15.5.el6                                        base                                         44 k
 perl-DBI                                         x86_64                                     1.609-4.el6                                           base                                        705 k

Transaction Summary
=====================================================================================================================================================================================================
Install       3 Package(s)

Total download size: 2.5 M
Installed size: 7.5 M
Downloading Packages:
(1/3): libtool-ltdl-2.2.6-15.5.el6.x86_64.rpm                                                                                                                                 |  44 kB     00:00
(2/3): perl-DBI-1.609-4.el6.x86_64.rpm                                                                                                                                        | 705 kB     00:00
(3/3): squid-3.1.10-18.el6_4.x86_64.rpm                                                                                                                                       | 1.7 MB     00:01
-----------------------------------------------------------------------------------------------------------------------------------------------------------------------------------------------------
Total                                                                                                                                                                942 kB/s | 2.5 MB     00:02
Running rpm_check_debug
Running Transaction Test
Transaction Test Succeeded
Running Transaction
  Installing : perl-DBI-1.609-4.el6.x86_64                                                                                                                                                       1/3
  Installing : libtool-ltdl-2.2.6-15.5.el6.x86_64                                                                                                                                                2/3
  Installing : 7:squid-3.1.10-18.el6_4.x86_64                                                                                                                                                    3/3
  Verifying  : 7:squid-3.1.10-18.el6_4.x86_64                                                                                                                                                    1/3
  Verifying  : libtool-ltdl-2.2.6-15.5.el6.x86_64                                                                                                                                                2/3
  Verifying  : perl-DBI-1.609-4.el6.x86_64                                                                                                                                                       3/3

Installed:
  squid.x86_64 7:3.1.10-18.el6_4

Dependency Installed:
  libtool-ltdl.x86_64 0:2.2.6-15.5.el6                                                                 perl-DBI.x86_64 0:1.609-4.el6

Complete!

We now would need to configure squid to start on boot

chkconfig squid on

SSL Proxying #

Squid has a rather nice feature called SSLBump which allows us to preform a Man In the Middle SSL Proxy. Privacy issues aside on this feature (after all we’re using it for servers not for end users) this is going to work for us from the server side of things. One key thing to note is we have to trust the CA, that we’re going to generate, on all applications / servers. I’m not going to cover how to do this in this post.

Normally when we create an SSL certificate we’d do this with a specific domain, however as we’re going to be proxying for all domains we’re going to use a wildcard certificate. For the “Common Name” or Server name, we need to chose “*” as the value.

In order to create the CA you can follow the following post. One point of note is to ensure that you do not do this on the Squid server, as this would mean that should the server be compromised, the CA (which is trusted on multiple servers) is now trusted as well.

We need to create the certificate using the CA script as per the above post. CA -newreq This will look similar to

Generating a 2048 bit RSA private key
...................................+++
.........................+++
writing new private key to 'newkey.pem'
Enter PEM pass phrase:
Verifying - Enter PEM pass phrase:
-----
You are about to be asked to enter information that will be incorporated
into your certificate request.
What you are about to enter is what is called a Distinguished Name or a DN.
There are quite a few fields but you can leave some blank
For some fields there will be a default value,
If you enter '.', the field will be left blank.
-----
Country Name (2 letter code) [GB]:
State or Province Name (full name) [London]:
Locality Name (eg, city) [London]:
Organization Name (eg, company) [AGrainOfSalt]:
Organizational Unit Name (eg, section) []:
Common Name (eg, your name or your server's hostname) []:*
Email Address []:

Please enter the following 'extra' attributes
to be sent with your certificate request
A challenge password []:
An optional company name []:
Request is in newreq.pem, private key is in newkey.pem

Once this is completed you’ll need to sign this with the CA -sign command

Using configuration from /etc/pki/tls/openssl.cnf
Enter pass phrase for /etc/pki/CA/private/cakey.pem:
Check that the request matches the signature
Signature ok
Certificate Details:
        Serial Number:
            c5:07:3c:dc:c5:8a:cb:ae
        Validity
            Not Before: Jul 21 16:45:48 2013 GMT
            Not After : Jul 21 16:45:48 2014 GMT
        Subject:
            countryName               = GB
            localityName              = London
            organizationName          = AGrainOfSalt
            commonName                = *
        X509v3 extensions:
            Authority Information Access:
                OCSP - URI:http://162.13.47.187:8888

            X509v3 Basic Constraints:
                CA:FALSE
            Netscape Comment:
                OpenSSL Generated Certificate
            X509v3 Subject Key Identifier:
                E8:30:79:47:75:8D:06:0C:CB:9E:84:47:65:61:D4:27:8D:61:52:D2
            X509v3 Authority Key Identifier:
                keyid:1F:F8:DB:5F:7B:FE:30:29:6F:E2:E2:C8:23:DE:5B:77:AE:82:2D:F8

Certificate is to be certified until Jul 21 16:45:48 2014 GMT (365 days)
Sign the certificate? [y/n]:y

1 out of 1 certificate requests certified, commit? [y/n]y
Write out database with 1 new entries
Data Base Updated
Certificate:
    Data:
        Version: 3 (0x2)
        Serial Number:
            c5:07:3c:dc:c5:8a:cb:ae
        Signature Algorithm: sha1WithRSAEncryption
        Issuer: C=GB, ST=London, O=AGrainOfSalt, CN=ca.test.local
        Validity
            Not Before: Jul 21 16:45:48 2013 GMT
            Not After : Jul 21 16:45:48 2014 GMT
        Subject: C=GB, L=London, O=AGrainOfSalt, CN=*
        Subject Public Key Info:
            Public Key Algorithm: rsaEncryption
                Public-Key: (2048 bit)
                Modulus:
                    00:e0:e7:17:43:65:55:7c:da:56:46:4c:44:11:2a:
                    96:8b:b9:c0:d0:55:10:d7:f7:c7:ca:29:3b:2d:1d:
                    08:46:00:db:23:78:58:04:36:35:79:ca:5a:4f:a3:
                    81:31:c7:4c:ec:a9:07:46:af:60:98:9d:ff:06:1c:
                    58:8f:16:53:97:1b:f1:b0:17:b5:9a:5c:eb:eb:7c:
                    c5:a9:3a:93:e2:8b:23:ad:d9:54:1e:c3:99:2c:8f:
                    24:1e:b0:0b:d3:3a:2f:b3:72:79:f5:71:d9:3b:52:
                    de:78:18:c4:41:8e:dc:5c:4c:96:da:90:75:1f:21:
                    f5:83:91:30:64:11:fe:af:b1:e1:fb:4d:4a:1f:06:
                    a4:7a:b0:bf:91:bc:74:5b:27:88:e3:0d:2e:1c:3c:
                    3b:e8:6c:7b:32:90:60:c8:4c:2a:db:84:fc:c2:53:
                    7a:6c:4b:ae:45:4a:86:4a:c6:a4:88:24:33:a6:f4:
                    de:8b:56:3b:59:3f🇩🇪92:c4:9d:f2:d4:2b:53:da:
                    62:05:94:7e:bc:f9:f8:45:53:88:56:13:30:67:ed:
                    6c:e7:0c:32:f8:53:03:49:3e:c3:c2:b6:06:83:e0:
                    d1:80:51:f4:86:f7:52:b0:7d:05:34:39:df:3b:46:
                    29:62:24:43:9a:b9:fe:ac:10:30:17:3a:e3:9a:d5:
                    ab:69
                Exponent: 65537 (0x10001)
        X509v3 extensions:
            Authority Information Access:
                OCSP - URI:http://162.13.47.187:8888

            X509v3 Basic Constraints:
                CA:FALSE
            Netscape Comment:
                OpenSSL Generated Certificate
            X509v3 Subject Key Identifier:
                E8:30:79:47:75:8D:06:0C:CB:9E:84:47:65:61:D4:27:8D:61:52:D2
            X509v3 Authority Key Identifier:
                keyid:1F:F8:DB:5F:7B:FE:30:29:6F:E2:E2:C8:23:DE:5B:77:AE:82:2D:F8

    Signature Algorithm: sha1WithRSAEncryption
        83:2c:00:e4:58:1f:db:02:aa:a8:ff:52:45:d3:63:4f:8f:47:
        8f:65:1e:21:c7:d7:c2:76:df:03:af:64:c1:e0:2c:d5:92:44:
        35:a4:c3:02:78:0a:43:0f:ed:91:03:2a:f8:00:5c:97:f7:fc:
        6f:81:69:96:3d:c3:ce:80:f2:d2:0d🇩🇪5c:2d:f0:27:ca:ba:
        1c:b4:09:8a:cc:b6:76:06:9f:a9:ad:a5:bf:9c:7d:9d:c5:f1:
        32:d4:d6:30:bf:bc:57:19:76:06:51:ee:e8:8b:f2:a1:4c:f7:
        69:ef:d4:96:58:4d:5a🇩🇪98:c5:f4:17:af:b5:d2:cc:26:f0:
        69:43:72:77:4a:e7:cf:79:62:b6:a4:47:75:4b:29:dc:2f:6f:
        e6:c6:d5:1a:79:e2:1d:bf:f8:82:04:fe:d0:21:7a:8b:4e:1e:
        93:10:f4:81:d6:9d:41:9a:70:02:e7:3f:22:1a:d8:a6:2e:21:
        8a:b1:34:03:1c:83:ca:8c:19:59:1b:d6:85:f7:eb:e2:a7:32:
        d9:61:5c:e6:68:b3:ef:ba:27:4a:3f:ff:5a:6e:d2:60:36:bb:
        a2:0a:ba:aa:4f:d9:22:7e🆎7e:78:80:87:6d:51:92:44:61:
        e6:aa:63:fa:e5:13:88:c9:f9🇩🇪90:31:9f:28:78:ca:79:74:
        ff:0e:a4:0b
-----BEGIN CERTIFICATE-----
MIIDxTCCAq2gAwIBAgIJAMUHPNzFisuuMA0GCSqGSIb3DQEBBQUAME0xCzAJBgNV
BAYTAkdCMQ8wDQYDVQQIDAZMb25kb24xFTATBgNVBAoMDEFHcmFpbk9mU2FsdDEW
MBQGA1UEAwwNY2EudGVzdC5sb2NhbDAeFw0xMzA3MjExNjQ1NDhaFw0xNDA3MjEx
NjQ1NDhaMEExCzAJBgNVBAYTAkdCMQ8wDQYDVQQHDAZMb25kb24xFTATBgNVBAoM
DEFHcmFpbk9mU2FsdDEKMAgGA1UEAwwBKjCCASIwDQYJKoZIhvcNAQEBBQADggEP
ADCCAQoCggEBAODnF0NlVXzaVkZMRBEqlou5wNBVENf3x8opOy0dCEYA2yN4WAQ2
NXnKWk+jgTHHTOypB0avYJid/wYcWI8WU5cb8bAXtZpc6+t8xak6k+KLI63ZVB7D
mSyPJB6wC9M6L7NyefVx2TtS3ngYxEGO3FxMltqQdR8h9YORMGQR/q+x4ftNSh8G
pHqwv5G8dFsniOMNLhw8O+hsezKQYMhMKtuE/MJTemxLrkVKhkrGpIgkM6b03otW
O1k/3pLEnfLUK1PaYgWUfrz5+EVTiFYTMGftbOcMMvhTA0k+w8K2BoPg0YBR9Ib3
UrB9BTQ53ztGKWIkQ5q5/qwQMBc645rVq2kCAwEAAaOBszCBsDA1BggrBgEFBQcB
AQQpMCcwJQYIKwYBBQUHMAGGGWh0dHA6Ly8xNjIuMTMuNDcuMTg3Ojg4ODgwCQYD
VR0TBAIwADAsBglghkgBhvhCAQ0EHxYdT3BlblNTTCBHZW5lcmF0ZWQgQ2VydGlm
aWNhdGUwHQYDVR0OBBYEFOgweUd1jQYMy56ER2Vh1CeNYVLSMB8GA1UdIwQYMBaA
FB/42197/jApb+LiyCPeW3eugi34MA0GCSqGSIb3DQEBBQUAA4IBAQCDLADkWB/b
Aqqo/1JF02NPj0ePZR4hx9fCdt8Dr2TB4CzVkkQ1pMMCeApDD+2RAyr4AFyX9/xv
gWmWPcPOgPLSDd5cLfAnyroctAmKzLZ2Bp+praW/nH2dxfEy1NYwv7xXGXYGUe7o
i/KhTPdp79SWWE1a3pjF9BevtdLMJvBpQ3J3SufPeWK2pEd1SyncL2/mxtUaeeId
v/iCBP7QIXqLTh6TEPSB1p1BmnAC5z8iGtimLiGKsTQDHIPKjBlZG9aF9+vipzLZ
YVzmaLPvuidKP/9abtJgNruiCrqqT9kifqt+eICHbVGSRGHmqmP65ROIyfnekDGf
KHjKeXT/DqQL
-----END CERTIFICATE-----
Signed certificate is in newcert.pem

Once this is completed, ensure that newcert.pem and newkey.pem are copied to the squid server. You will then also need to remove the passphrase from the key.

openssl rsa -in newkey.pem -out sslbump.pem

Once this is done, you’ll need to then also copy the cert into the same file

cat newcert.pem >> sslbump.pem

Configuring Squid #

We’re going to make a very simple squid config, allowing access from the App servers to youtube.com, but no other hosts. Replace /etc/squid/squid.conf with the following

acl manager proto cache_object
acl localhost src 127.0.0.1/32 ::1
acl SSL_ports port 443
acl Safe_ports port 80          # http
acl Safe_ports port 443         # https
acl CONNECT method CONNECT
acl youtube dstdomain www.youtube.com
acl app_server src 192.168.0.3/32

http_access deny manager
http_access deny !Safe_ports
http_access deny CONNECT !SSL_ports

ssl_bump allow app_server youtube
http_access allow app_server youtube
http_access deny all
ssl_bump deny all

hierarchy_stoplist cgi-bin ?
coredump_dir /var/spool/squid

# Listen on 3128 and do ssl-bump
http_port 3128 ssl-bump cert=/etc/squid/sslbump.pem
# Don't cache / refresh anything
refresh_pattern .               0       0%      0

Testing Squid #

We’re going to use the curl command to test that the ACLs are working

First lets test google, this should fail. We specify the proxy with the -x flag

[root@box1 squid]# curl -I www.google.com -x 192.168.0.2:3128
HTTP/1.0 403 Forbidden
Server: squid/3.1.10
Mime-Version: 1.0
Date: Sun, 21 Jul 2013 17:23:36 GMT
Content-Type: text/html
Content-Length: 3274
X-Squid-Error: ERR_ACCESS_DENIED 0
Vary: Accept-Language
Content-Language: en
X-Cache: MISS from box1.agrainofsalt.com
X-Cache-Lookup: NONE from box1.agrainofsalt.com:3128
Via: 1.0 box1.agrainofsalt.com (squid/3.1.10)
Connection: keep-alive

As you can see we get a 403 on this from Squid

Lets now try http access to youtube.com

[root@box1 squid]# curl -I www.youtube.com -x 192.168.0.2:3128
HTTP/1.0 200 OK
Date: Sun, 21 Jul 2013 17:25:37 GMT
Server: gwiseguy/2.0
X-Frame-Options: SAMEORIGIN
X-YouTube-Other-Cookies: VISITOR_INFO1_LIVE=A4yQlrbOatM;PREF=f1=50000000
P3P: CP="This is not a P3P policy! See http://support.google.com/accounts/bin/answer.py?answer=151657&hl=en-GB for more info."
X-Content-Type-Options: nosniff
Cache-Control: no-cache
Expires: Tue, 27 Apr 1971 19:44:06 EST
Set-Cookie: YSC=zqSQpd08t-o; path=/; domain=.youtube.com; httponly
Set-Cookie: PREF=f1=50000000; path=/; domain=.youtube.com; expires=Sat, 22-Mar-2014 05:18:37 GMT
Set-Cookie: VISITOR_INFO1_LIVE=A4yQlrbOatM; path=/; domain=.youtube.com; expires=Sat, 22-Mar-2014 05:18:36 GMT
Content-Type: text/html; charset=utf-8
X-XSS-Protection: 1; mode=block
X-Cache: MISS from box1.agrainofsalt.com
X-Cache-Lookup: MISS from box1.agrainofsalt.com:3128
Via: 1.0 box1.agrainofsalt.com (squid/3.1.10)
Connection: keep-alive

This works as expected. Lets try https to youtube.com now!

[root@box1 squid]# curl -I https://www.youtube.com/ -x 127.0.0.1:3128
HTTP/1.0 200 Connection established

curl: (60) Peer certificate cannot be authenticated with known CA certificates
More details here: http://curl.haxx.se/docs/sslcerts.html

curl performs SSL certificate verification by default, using a "bundle"
 of Certificate Authority (CA) public keys (CA certs). If the default
 bundle file isn't adequate, you can specify an alternate file
 using the --cacert option.
If this HTTPS server uses a certificate signed by a CA represented in
 the bundle, the certificate verification probably failed due to a
 problem with the certificate (it might be expired, or the name might
 not match the domain name in the URL).
If you'd like to turn off curl's verification of the certificate, use
 the -k (or --insecure) option.

This has failed as we’ve not got the CA certificate in the bundle that curl uses, lets get curl to ignore the SSL certificate

[root@box1 squid]# curl -Ik https://www.youtube.com/ -x 127.0.0.1:3128
HTTP/1.0 200 Connection established

HTTP/1.0 503 Service Unavailable
Server: squid/3.1.10
Mime-Version: 1.0
Date: Sun, 21 Jul 2013 18:36:00 GMT
Content-Type: text/html
Content-Length: 3408
X-Squid-Error: ERR_CANNOT_FORWARD 0
Vary: Accept-Language
Content-Language: en
X-Cache: MISS from box1.agrainofsalt.com
X-Cache-Lookup: MISS from box1.agrainofsalt.com:3128
Via: 1.0 box1.agrainofsalt.com (squid/3.1.10)
Connection: keep-alive

Now lets just make sure that other https sites don’t work.

[root@box1 squid]# curl -Ik https://www.gmail.com/ -x 127.0.0.1:3128
HTTP/1.0 403 Forbidden
Server: squid/3.1.10
Mime-Version: 1.0
Date: Sun, 21 Jul 2013 18:36:28 GMT
Content-Type: text/html
Content-Length: 3261
X-Squid-Error: ERR_ACCESS_DENIED 0
Vary: Accept-Language
Content-Language: en
X-Cache: MISS from box1.agrainofsalt.com
X-Cache-Lookup: NONE from box1.agrainofsalt.com:3128
Via: 1.0 box1.agrainofsalt.com (squid/3.1.10)
Connection: keep-alive

curl: (56) Received HTTP code 403 from proxy after CONNECT

Forwarding all traffic via the Proxy server #

Now the way that this is done depends on the firewall or router in use. What we need to achieve is to either D-NAT or redirect all traffic on port 80 / 443 outbound to the Squid server.

For a Cisco ASA there is a guide on how to do this with WCCP

For a Linux based device you would want to have a IPTables rule similar to

iptables -t nat -A PREROUTING -i eth1 -p tcp --dport 80 -j DNAT --to 192.168.0.2:3128 -s ! 192.168.0.2
iptables -t nat -A PREROUTING -i eth1 -p tcp --dport 443 -j DNAT --to 192.168.0.2:3128 -s ! 192.168.0.2


Creating a CA using OpenSSL - with OCSP

·2110 words·10 mins

SSL Certificates are a source of huge amounts of confusion. There are two things that a SSL session will provide. The first is encryption, which can be provided with “self signed” certificates. The second, and arguably the more important is authentication of the remote server. This is managed by “Certification Authorities”. Web Browsers will have a set of known CAs that are trusted, and any certificate signed by them is therefore also trusted. Obviously if a CA has had a security breach then all bets are off.

Within an organisation it is usually preferable for NON PUBLIC facing sites and services to use ‘self signed’ or internal CA signed certificates. The later is usually more sensible, however it comes with the issue of more administrative time is required, and also that all clients must trust this CA.

There are various different ways of creating a CA, Windows Server 2003 and above come with their own CA software, and most UNIX/Linux distributions have OpenSSL available.

In this guide I’m going to walk through the creation of a CA using OpenSSL. I’m also going to look at enabling additional features such as OSCP (a way of clients confirming if a certificate is still valid) and go over how to create “Server Alternative Name” certificates (also known as UC or SAN certs, allowing multiple hostnames/domainnames to exist on the same cert).

One key thing to remember here is security of the CA. You must ensure that no unauthorized access is permitted to the CA, as if someone has been able to gain this, they will have access to issue certificates.

I’m also going to ensure that we setup OCSP, which is a way of clients checking to see that certificates are still valid and not revoked.

Prerequisites #

Before we start we need to have the following:

  • A Linux Server with openssl installed (for this example I’m going to be using CentOS 6.4, however any linux distribution should work)
  • A Domain name (in this example I’m going to use test.local)

Configure OpenSSL #

On a CentOS/RedHat system there is already a basic openssl.cnf file created, that the scripts for managing a CA already take into account. /etc/pki/tls/openssl.cnf

Open this up in which ever editor you like and do the following:

  • Locate countryName_default = XX and change the XX to which ever country code you are in, for example the United Kingdom would be GB
  • Locate #stateOrProvinceName_default = Default Province and edit this line so there is no # at the start, and that Default Province now is set to our State/Proviince/County/City
  • Locate localityName_default = Default City and edit this to be your City
  • Locate 0.organizationName_default and edit this to be your Org name

At this point we’ve edited the config so that for any new requests you won’t have to type these in!

Whilst still in the Text Editor we need to setup the OCSP side of things.

  • Locate the [ usr_cert ] section and add
    authorityInfoAccess = OCSP;URI:http://URL_TO_SERVER_THAT_WILL_HOST_OCSP:8888
    

In this example I’m going to put this on the CA, but this is NOT a good idea from a security perspective. You want the CA to have as little (if indeed any) access from the outside.

  • We also need to create the OCSP ‘extensions’ section. Add this to the end of the file
      [ v3_OCSP ]
      basicConstraints = CA:FALSE
      keyUsage = nonRepudiation, digitalSignature, keyEncipherment
      extendedKeyUsage = OCSPSigning
    

Create the CA #

We’re going to use the OpenSSL CA script to do this.

  • Change directory to /etc/pki/tls/misc
  • Run the CA command: ./CA -newca
  • Whilst Running it you will be asked
    • File name: Just hit enter here
    • PEM Passphrase:x this is the password you will use for the CA. Make sure it’s secure!
    • Country Name : Hit enter here
    • State or Province Name : Hit enter here
    • Locality Name (eg, city) : Hit enter here
    • Organization Name (eg, company) : Hit enter here
    • Organizational Unit Name : Hit enter here
    • Common Name (eg, your name or your server’s hostname): For this its generally considered best to set this to ca.domain, so in this case ca.test.local
    • Email Address: Hit enter here
    • A challenge password: Hit Enter here
    • An optional company name: Hit enter here
    • Enter pass phrase for /etc/pki/CA/private/./cakey.pem: Enter the CA password here

The end output should look similar to

[root@box1 misc]# ./CA -newca
CA certificate filename (or enter to create)

Making CA certificate ...
Generating a 2048 bit RSA private key
......................................................................+++
.......+++
writing new private key to '/etc/pki/CA/private/./cakey.pem'
Enter PEM pass phrase:
Verifying - Enter PEM pass phrase:
-----
You are about to be asked to enter information that will be incorporated
into your certificate request.
What you are about to enter is what is called a Distinguished Name or a DN.
There are quite a few fields but you can leave some blank
For some fields there will be a default value,
If you enter '.', the field will be left blank.
-----
Country Name (2 letter code) [GB]:
State or Province Name (full name) [London]:
Locality Name (eg, city) [London]:
Organization Name (eg, company) [AGrainOfSalt]:
Organizational Unit Name (eg, section) []:
Common Name (eg, your name or your server's hostname) []:ca.test.local
Email Address []:

Please enter the following 'extra' attributes
to be sent with your certificate request
A challenge password []:
An optional company name []:
Using configuration from /etc/pki/tls/openssl.cnf
Enter pass phrase for /etc/pki/CA/private/./cakey.pem:
Check that the request matches the signature
Signature ok
Certificate Details:
        Serial Number:
            c5:07:3c:dc:c5:8a:cb:ab
        Validity
            Not Before: Jul 21 09:37:18 2013 GMT
            Not After : Jul 20 09:37:18 2016 GMT
        Subject:
            countryName               = GB
            stateOrProvinceName       = London
            organizationName          = AGrainOfSalt
            commonName                = ca.test.local
        X509v3 extensions:
            X509v3 Subject Key Identifier:
                1F:F8:DB:5F:7B:FE:30:29:6F:E2:E2:C8:23:DE:5B:77:AE:82:2D:F8
            X509v3 Authority Key Identifier:
                keyid:1F:F8:DB:5F:7B:FE:30:29:6F:E2:E2:C8:23:DE:5B:77:AE:82:2D:F8

            X509v3 Basic Constraints:
                CA:TRUE
Certificate is to be certified until Jul 20 09:37:18 2016 GMT (1095 days)

Write out database with 1 new entries
Data Base Updated
[root@box1 misc]#

At this point you have a CA setup and ready to go. You will need to ensure that the CA public certificate is installed on the browsers / devices that you will be using. This can be downloaded using a SCP client from /etc/pki/CA/cacert.pem

Creating a OCSP signing certificate #

In order to host an OCSP server, we have to generate a OCSP signing certificate. If you’re going to have multiple OCSP servers, you may want to have multiple certificates.

We’re going to create a directory, and a request for the certificate

cd /etc/pki/CA
mkdir OCSP
cd OCSP
openssl req -new -nodes -out ocsp.test.local.csr -keyout ocsp.test.local.key -extensions v3_OCSP

At this point we now need to sign the request and make the certificate

openssl ca -in ocsp.test.local.csr -out ocsp.test.local.crt -extensions v3_OCSP

You will be asked for

  • CA Passphrase
  • Sign the certificate? [y/n]: Say yes to this
  • 1 out of 1 certificate requests certified, commit? Say yes to this as well

Start OCSP server #

At this point we now also need to run the OCSP server. Be aware that this is going to run as root in this example, which you should NOT do. You will want to ensure permissions are done in a way that a normal user, I’m not going to cover this at the moment though. Start the server with the following

openssl ocsp -index /etc/pki/CA/index.txt -port 8888 -rsigner /etc/pki/CA/OCSP/ocsp.test.local.crt -rkey /etc/pki/CA/OCSP/ocsp.test.local.key -CA /etc/pki/CA/cacert.pem -text -out /etc/pki/CA/OCSP/log.txt &

Issuing a Certificate #

Now that you’ve got a working CA, you can sign any certificate requests. There are multiple ways of creating these, some software will provide you a CSR, but in this example I’m going to do this all on the CA its self (don’t do this in production!)

  • Change directory to /etc/pki/tls/misc
  • Run the CA command: ./CA -newreq

This will give a result similar to below

Generating a 2048 bit RSA private key
...................................+++
.........................+++
writing new private key to 'newkey.pem'
Enter PEM pass phrase:
Verifying - Enter PEM pass phrase:
-----
You are about to be asked to enter information that will be incorporated
into your certificate request.
What you are about to enter is what is called a Distinguished Name or a DN.
There are quite a few fields but you can leave some blank
For some fields there will be a default value,
If you enter '.', the field will be left blank.
-----
Country Name (2 letter code) [GB]:
State or Province Name (full name) []:London
Locality Name (eg, city) [London]:
Organization Name (eg, company) [AGrainOfSalt]:
Organizational Unit Name (eg, section) []:
Common Name (eg, your name or your server's hostname) []:web1.test.local
Email Address []:

Please enter the following 'extra' attributes
to be sent with your certificate request
A challenge password []:
An optional company name []:
Request is in newreq.pem, private key is in newkey.pem

We now need to sign the certificate

  • Run the CA command ./CA -sign

This will give a result similar to

[root@box1 misc]# ./CA -sign
Using configuration from /etc/pki/tls/openssl.cnf
Enter pass phrase for /etc/pki/CA/private/cakey.pem:
Check that the request matches the signature
Signature ok
Certificate Details:
        Serial Number:
            c5:07:3c:dc:c5:8a:cb:ad
        Validity
            Not Before: Jul 21 13:02:27 2013 GMT
            Not After : Jul 21 13:02:27 2014 GMT
        Subject:
            countryName               = GB
            stateOrProvinceName       = London
            localityName              = London
            organizationName          = AGrainOfSalt
            commonName                = web1.test.local
        X509v3 extensions:
            Authority Information Access:
                OCSP - URI:http://162.13.47.187:8888

            X509v3 Basic Constraints:
                CA:FALSE
            Netscape Comment:
                OpenSSL Generated Certificate
            X509v3 Subject Key Identifier:
                60:06:C1:47:5B:DE:6F:0C:64:00:DA:A9:77:05:67:AA:8F:39:C9:AF
            X509v3 Authority Key Identifier:
                keyid:1F:F8:DB:5F:7B:FE:30:29:6F:E2:E2:C8:23:DE:5B:77:AE:82:2D:F8

Certificate is to be certified until Jul 21 13:02:27 2014 GMT (365 days)
Sign the certificate? [y/n]:y

1 out of 1 certificate requests certified, commit? [y/n]y
Write out database with 1 new entries
Data Base Updated
Certificate:
    Data:
        Version: 3 (0x2)
        Serial Number:
            c5:07:3c:dc:c5:8a:cb:ad
        Signature Algorithm: sha1WithRSAEncryption
        Issuer: C=GB, ST=London, O=AGrainOfSalt, CN=ca.test.local
        Validity
            Not Before: Jul 21 13:02:27 2013 GMT
            Not After : Jul 21 13:02:27 2014 GMT
        Subject: C=GB, ST=London, L=London, O=AGrainOfSalt, CN=web1.test.local
        Subject Public Key Info:
            Public Key Algorithm: rsaEncryption
                Public-Key: (2048 bit)
                Modulus:
                    00:97:d0:a4:0e:c3:61:c0:b0:8e:af:5b:2a:96:85:
                    fc:e8:e9:23:3c:97:f0:2f:15:5e:a3:00:49:0c:b6:
                    2d:5a:2c:f0:ff:ca:2c:49:f1:ee:d8:3a:0b:f2🆎
                    9b:96:f8:a2:cf:a2:6a:82:63:3b:7a:9b:7c:b1:4c:
                    4a:65:c8:70:cc:7c:90:1b:7b:b3:a0:6c:91:5d:1e:
                    12:93:31:d0:68:bb:33:6e:e7:54:91:fc:f8:e1:b3:
                    3e:26:33:4c:d0:d7:ea:fd:6f:1f:b6:a4:cf:1b:82:
                    03:41:58:d5:47:4d:f6:a3:50:a5:4e:92:74:96:c6:
                    1f:b2:3d:33:00:25:62:35:2b:89:6e:60:37:d0:44:
                    d4:11:89:0d:21:ed:3f:d3:54:db:c5:21:5f:43:3f:
                    bd:2b:e6:a9:48:f1:dd:11:0f:a2:f2:d9:7a:2f:0b:
                    78:8c:98:b2:3a:4b:23:fb:16:41:9e:b8:69:ee:e5:
                    22:bc:67:49:40:fe:eb:13:d6:45:50:3b:cc:14:b3:
                    1b:ba:e1:5d:89:33:ed:8e:6a:05:36:0e:c2:bb:21:
                    9f:6f:6b:17:99:a2:53:cc:69:24:03:95:db:89:79:
                    46:8d:05:ed:1d:b6:c3:22:89:9a:43:e5:ff:c1:b7:
                    58:f1:40🆎b1:e5:ca:c1:ec:64:59:a7:fb:53:44:
                    8e:27
                Exponent: 65537 (0x10001)
        X509v3 extensions:
            Authority Information Access:
                OCSP - URI:http://162.13.47.187:8888

            X509v3 Basic Constraints:
                CA:FALSE
            Netscape Comment:
                OpenSSL Generated Certificate
            X509v3 Subject Key Identifier:
                60:06:C1:47:5B:DE:6F:0C:64:00:DA:A9:77:05:67:AA:8F:39:C9:AF
            X509v3 Authority Key Identifier:
                keyid:1F:F8:DB:5F:7B:FE:30:29:6F:E2:E2:C8:23:DE:5B:77:AE:82:2D:F8

    Signature Algorithm: sha1WithRSAEncryption
        88:05:46🆎a5:50:08:56:50:ca:4b:15:af:1e:84🆎b1:d0:
        b0:b9:81:52:0b:f5:e6:28:51:71:a6:11:64:46:04:42:84:eb:
        84:5f:d1:87:64:18:60:1b:31:7a:13:b2:9d:10:bd:56:7a:7f:
        2e:88:23:55:52:a4:a2:9d:d0:8c:70:b7:0a:69:50:96:fa:54:
        be:6b:bd:24:25:9d:59:52:30:33:92:cc:63:3e:5c:47:87:e3:
        ca:d0:55:09:c3:2a:4b:fc:f0:b8:34:3f:1a:d3:b9:3a:66:7f:
        86:d1:8c:08:4c:cf:19:3d:c5:c7:3f:b1:73:7b:bd:54:73:c6:
        65:74:8e:8a:17:5a:e9:d9:bd:91:39:8b:ae:46:10:52:d9:03:
        db:51:3a:14:41:2b:96:6c:ea:db:c7:20:89:48:ae:32:fe:05:
        66:2b:5c:48:19:7b:b8:45:99:7a:b1:45:b0:66:06:31:3d:86:
        c5:c3:7b:99:d5:cf:1f:9d:64:69:bf:60:1a:d8:03:7e:75:e2:
        44:b7:41:36:aa:b8:c0:df:9c:24:74:eb🆎b6:b3:1b:74:be:
        73:bf:52:bd:b7🇩🇪31:81:ff:df:b6:f4:b9:8f:9f:22:93:3b:
        12:5c:a4:6a:3f:aa:8e:8a:7c:69:65:e9:65:f7:98:44:1b:59:
        7d:e4:ca:e0
-----BEGIN CERTIFICATE-----
MIID5DCCAsygAwIBAgIJAMUHPNzFisutMA0GCSqGSIb3DQEBBQUAME0xCzAJBgNV
BAYTAkdCMQ8wDQYDVQQIDAZMb25kb24xFTATBgNVBAoMDEFHcmFpbk9mU2FsdDEW
MBQGA1UEAwwNY2EudGVzdC5sb2NhbDAeFw0xMzA3MjExMzAyMjdaFw0xNDA3MjEx
MzAyMjdaMGAxCzAJBgNVBAYTAkdCMQ8wDQYDVQQIDAZMb25kb24xDzANBgNVBAcM
BkxvbmRvbjEVMBMGA1UECgwMQUdyYWluT2ZTYWx0MRgwFgYDVQQDDA93ZWIxLnRl
c3QubG9jYWwwggEiMA0GCSqGSIb3DQEBAQUAA4IBDwAwggEKAoIBAQCX0KQOw2HA
sI6vWyqWhfzo6SM8l/AvFV6jAEkMti1aLPD/yixJ8e7YOgvyq5uW+KLPomqCYzt6
m3yxTEplyHDMfJAbe7OgbJFdHhKTMdBouzNu51SR/Pjhsz4mM0zQ1+r9bx+2pM8b
ggNBWNVHTfajUKVOknSWxh+yPTMAJWI1K4luYDfQRNQRiQ0h7T/TVNvFIV9DP70r
5qlI8d0RD6Ly2XovC3iMmLI6SyP7FkGeuGnu5SK8Z0lA/usT1kVQO8wUsxu64V2J
M+2OagU2DsK7IZ9vaxeZolPMaSQDlduJeUaNBe0dtsMiiZpD5f/Bt1jxQKux5crB
7GRZp/tTRI4nAgMBAAGjgbMwgbAwNQYIKwYBBQUHAQEEKTAnMCUGCCsGAQUFBzAB
hhlodHRwOi8vMTYyLjEzLjQ3LjE4Nzo4ODg4MAkGA1UdEwQCMAAwLAYJYIZIAYb4
QgENBB8WHU9wZW5TU0wgR2VuZXJhdGVkIENlcnRpZmljYXRlMB0GA1UdDgQWBBRg
BsFHW95vDGQA2ql3BWeqjznJrzAfBgNVHSMEGDAWgBQf+Ntfe/4wKW/i4sgj3lt3
roIt+DANBgkqhkiG9w0BAQUFAAOCAQEAiAVGq6VQCFZQyksVrx6Eq7HQsLmBUgv1
5ihRcaYRZEYEQoTrhF/Rh2QYYBsxehOynRC9Vnp/LogjVVKkop3QjHC3CmlQlvpU
vmu9JCWdWVIwM5LMYz5cR4fjytBVCcMqS/zwuDQ/GtO5OmZ/htGMCEzPGT3Fxz+x
c3u9VHPGZXSOihda6dm9kTmLrkYQUtkD21E6FEErlmzq28cgiUiuMv4FZitcSBl7
uEWZerFFsGYGMT2GxcN7mdXPH51kab9gGtgDfnXiRLdBNqq4wN+cJHTrq7azG3S+
c79SvbfeMYH/37b0uY+fIpM7Elykaj+qjop8aWXpZfeYRBtZfeTK4A==
-----END CERTIFICATE-----
Signed certificate is in newcert.pem

The certificate now exists and can be seen in newcert.pem (and the key in newkey.pem)

Checking OCSP status #

We can now check to see if the above certificate is valid via OCSP:

openssl ocsp -CAfile /etc/pki/CA/cacert.pem -issuer /etc/pki/CA/cacert.pem -cert newcert.pem -url http://127.0.0.1:8888 -resp_text

This will return an address similar to below:

[root@box1 misc]# openssl ocsp -CAfile /etc/pki/CA/cacert.pem -issuer /etc/pki/CA/cacert.pem -cert newcert.pem -url http://127.0.0.1:8888 -resp_text
OCSP Response Data:
    OCSP Response Status: successful (0x0)
    Response Type: Basic OCSP Response
    Version: 1 (0x0)
    Responder Id: C = GB, ST = London, O = AGrainOfSalt, CN = ocsp.test.local
    Produced At: Jul 21 13:06:37 2013 GMT
    Responses:
    Certificate ID:
      Hash Algorithm: sha1
      Issuer Name Hash: CD84AAE91120F3595F8B572F367D17BBD2B7D51E
      Issuer Key Hash: 1FF8DB5F7BFE30296FE2E2C823DE5B77AE822DF8
      Serial Number: C5073CDCC58ACBAD
    Cert Status: good
    This Update: Jul 21 13:06:37 2013 GMT

    Response Extensions:
        OCSP Nonce:
            04108CFBA6175ED9F3E58C50C39889E2B484
    Signature Algorithm: sha1WithRSAEncryption
        ba:2e:74:c5:3a:57:88:f1:7a:0f:d4:e9:01:f0:7c:31:2e:a3:
        31:cb:25:c4:8a:91:e6:05:88:39:3a:18:ef:89:eb:02:6a:46:
        12:4e:12:90:85:55:3d:22:67:aa:68🆎11:08:d9:89:29:20:
        b6:36:78:89:3d:5d:c5:9b:7a:94:1a:e4:4f:48:b2:45:53:0b:
        86:65:fb:64:cc:e0:15:a6:32:7a:2d:00:c1:a6:c7:25:c1:a0:
        f8:4b:67:42:77:ad:cf🆎01:8a:0c:3a:65:18:3f:d7:85:26:
        6c:a4:d0🆎8c:40:2e:2f:f7:3f:0f:9d:f7:6c:80:d8:52:0e:
        8b:21:5d:3c:cb:d9:6b:c3:87:05:eb:00:4d:6a:b8:74:d5:28:
        fb:08:63:4a:b4:4b:c8:67:c9:01:f7:51:75:6e:50:15:bd:db:
        a9:cc:83:26:63:67:ce:2b:96:d6:e2:e8:df:01:82:36:75:23:
        44:30:d9:8e:32:a9:74:ce:69:4c:f3:79:80:a5:73:75:b3:bf:
        c2:b4:66:e8:70:b7:4c:9c:4a:3d:2a:ff:98:25:d2:19:86:3b:
        70:78:e0:7c:72:82:69:e0:08:6e:1d:a5:e8:d2:6f:4d:e7:a5:
        a2:15:05:5f:98:b5:1e:20:13:54:e2:e2:62:4d:38:5d:e8:b1:
        56:15:97:00
Certificate:
    Data:
        Version: 3 (0x2)
        Serial Number:
            c5:07:3c:dc:c5:8a:cb:ac
        Signature Algorithm: sha1WithRSAEncryption
        Issuer: C=GB, ST=London, O=AGrainOfSalt, CN=ca.test.local
        Validity
            Not Before: Jul 21 10:16:20 2013 GMT
            Not After : Jul 21 10:16:20 2014 GMT
        Subject: C=GB, ST=London, O=AGrainOfSalt, CN=ocsp.test.local
        Subject Public Key Info:
            Public Key Algorithm: rsaEncryption
                Public-Key: (2048 bit)
                Modulus:
                    00:f2:1e:67:ef:42:45:2c:3f:ed:09:c6:d2:11:ca:
                    28:ce:16:ac:2b:15:7a:25:34:dc:35:2d:d9:6e:60:
                    b6:06:ed:ea:fc:ec:0e:37:0f:44:bc:25:02:b6:41:
                    a2:89:c8:58:e3:cc:0d:c4:b6:b1:e3:08:b0:2d:6c:
                    85:52:0a:3a:4c:ae:ad:1b:8a:d7:0b:fd:da:f7:85:
                    94:66:e9:25:48:a3:d6:07:27:e6:51:ee:03:96:db:
                    80:ec:60:00:27:ac:8f:93:63:e6:8a:22:d9:45:da:
                    8a:93:67:aa:d8:6a:00:32:0c:8c:84:87:47:30:a2:
                    96:21:44:e1💿19:a9:bb:0e:9a:70:5b:fc:4e:a0:
                    79:ca:27:b0:5f:c0:7c:3d:23:c7:ae:26:c2:20:86:
                    97:89:f6:a9:32:0e:e9:10:c1:c0:f3:51:4e:61:a7:
                    6c:ea:84:d2:d2:7d:ec:6d:58:f8:5c:c8:4e:37:f1:
                    05:03:52:07:fc:96:dd:69:8b:6e:30:d9:75:0a:4c:
                    17:74:89:4c:bc:06:b0:d9:d3:03:a3:bd:75:c5:9a:
                    2c:7b:75:f8:6f:e4:44:a9:ef:08:49:aa:88:49:1a:
                    41:d7:98:8e:8f:ac:be:bb:e1:66:e0:33:05:2d:64:
                    7e:90:fc:62:eb:bc:18:45:7d:cb:23:bb:af:3c:2c:
                    0b:a1
                Exponent: 65537 (0x10001)
        X509v3 extensions:
            X509v3 Basic Constraints:
                CA:FALSE
            X509v3 Key Usage:
                Digital Signature, Non Repudiation, Key Encipherment
            X509v3 Extended Key Usage:
                OCSP Signing
    Signature Algorithm: sha1WithRSAEncryption
        92:e0:49:92:23:63:fe:04:8d:5d:cf:79:fb:60:b6:3d:63:6c:
        43:8d:5a:95:09:ae:c0:75:ea:c3:08:9e:f1:1e:f3:bf:34:c4:
        f2:d7:93:58:55:b4:c5:3a:16:48:76:d8:04:b3:dc:69:67:ce:
        e3:16:6a:e9:47:06:33:16:9e:aa:e2:99:49:74:9b:2c:22:99:
        3e:5b:50:57:2b:46:da:25:d6:e7:5b:4e:36:bd:82:ac:3a:d0:
        f2:73:c0:c4:1e:27:57:63:c5:fb:0c:19:86:2b:45:dc:cb:f1:
        b5:9c:fa:22:da:d9:0c:e4:e0:5a:53:87:e1:6e:d9:7b:d9:7d:
        cf:33:90:66:07:b3:9a:38:81:63:6c:c8:7f:a4:d2:8c:15:23:
        68:18:4a:ee:e4:61:b4:2d:29:43:75:8d:67:8a:08:55:30:e9:
        09:77:cc:24:71:1c:66:fe:77:25:28:89:f5:80:a2:7f:2d:be:
        81:22:51:33:c4:67:b9:67:1e:51:81:93:da:d7:f5:b4:80:fb:
        07:8d:c8:64:a2:98:9a:4c:55:97:88:6a:51:30:2c:2d:ba:ed:
        90:ec:bf:24:18:b0:17:c9:ae:95:85:8d:22:6b:b3:5f:9b:57:
        b7:96:38🆎0f:75:6b:47:57:56:24:d5:01:59:87:4f:76:e6:
        f5:72:97:12
-----BEGIN CERTIFICATE-----
MIIDTjCCAjagAwIBAgIJAMUHPNzFisusMA0GCSqGSIb3DQEBBQUAME0xCzAJBgNV
BAYTAkdCMQ8wDQYDVQQIDAZMb25kb24xFTATBgNVBAoMDEFHcmFpbk9mU2FsdDEW
MBQGA1UEAwwNY2EudGVzdC5sb2NhbDAeFw0xMzA3MjExMDE2MjBaFw0xNDA3MjEx
MDE2MjBaME8xCzAJBgNVBAYTAkdCMQ8wDQYDVQQIDAZMb25kb24xFTATBgNVBAoM
DEFHcmFpbk9mU2FsdDEYMBYGA1UEAwwPb2NzcC50ZXN0LmxvY2FsMIIBIjANBgkq
hkiG9w0BAQEFAAOCAQ8AMIIBCgKCAQEA8h5n70JFLD/tCcbSEcoozhasKxV6JTTc
NS3ZbmC2Bu3q/OwONw9EvCUCtkGiichY48wNxLax4wiwLWyFUgo6TK6tG4rXC/3a
94WUZuklSKPWByfmUe4DltuA7GAAJ6yPk2PmiiLZRdqKk2eq2GoAMgyMhIdHMKKW
IUThzRmpuw6acFv8TqB5yiewX8B8PSPHribCIIaXifapMg7pEMHA81FOYads6oTS
0n3sbVj4XMhON/EFA1IH/JbdaYtuMNl1CkwXdIlMvAaw2dMDo711xZose3X4b+RE
qe8ISaqISRpB15iOj6y+u+Fm4DMFLWR+kPxi67wYRX3LI7uvPCwLoQIDAQABoy8w
LTAJBgNVHRMEAjAAMAsGA1UdDwQEAwIF4DATBgNVHSUEDDAKBggrBgEFBQcDCTAN
BgkqhkiG9w0BAQUFAAOCAQEAkuBJkiNj/gSNXc95+2C2PWNsQ41alQmuwHXqwwie
8R7zvzTE8teTWFW0xToWSHbYBLPcaWfO4xZq6UcGMxaequKZSXSbLCKZPltQVytG
2iXW51tONr2CrDrQ8nPAxB4nV2PF+wwZhitF3MvxtZz6ItrZDOTgWlOH4W7Ze9l9
zzOQZgezmjiBY2zIf6TSjBUjaBhK7uRhtC0pQ3WNZ4oIVTDpCXfMJHEcZv53JSiJ
9YCify2+gSJRM8RnuWceUYGT2tf1tID7B43IZKKYmkxVl4hqUTAsLbrtkOy/JBiw
F8mulYWNImuzX5tXt5Y4qw91a0dXViTVAVmHT3bm9XKXEg==
-----END CERTIFICATE-----
Response verify OK
newcert.pem: good
        This Update: Jul 21 13:06:37 2013 GMT

Revoking a certificate. #

Oh no! The certificate above has been compromised. We need to revoke it. This isn’t as difficult as you may think. We have a copy of all of the certificates on the CA. If we look at the certificate serial number (c5:07:3c:dc:c5:8a:cb:ad in this case) this file should exist in /etc/pki/CA/newcerts/ To revoke you need to

  • Revoke the certificate
    openssl ca -revoke /etc/pki/CA/newcerts/C5073CDCC58ACBAD.pem
    
  • Verify that the certifcate is revoked
    openssl ocsp -CAfile /etc/pki/CA/cacert.pem -issuer /etc/pki/CA/cacert.pem -cert /etc/pki/CA/newcerts/C5073CDCC58ACBAD.pem -url http://127.0.0.1:8888 -resp_text


RouterBoard as a Home Router – 4 1/2 years on

·1067 words·6 mins

A while back I mentioned a follow up to an old blog post about the RouterBoard that i’d recently purchased and setup for home use. This is a very belated update on that board.

My requirements have since changed from the original post, but not dramatically so. The requirement for LACP has disapeared, IPSec is no longer used, but a requirement for Dynamic Routing has appeared.

All in all, I have to say that I still cannot recommend RouterOS enough. I’ve been using it the past 4 1/2 years, and have recommended a large number of folks to use it.

The main reason behind this is that it just works, there’s not really any faffing about that needs to be done, and if you’re running the stable release, everything does just work.

Feature wise, this is right up there with some of the big brands (Cisco, Juniper et all), however its fair to say not with the same price tag.

Hardware #

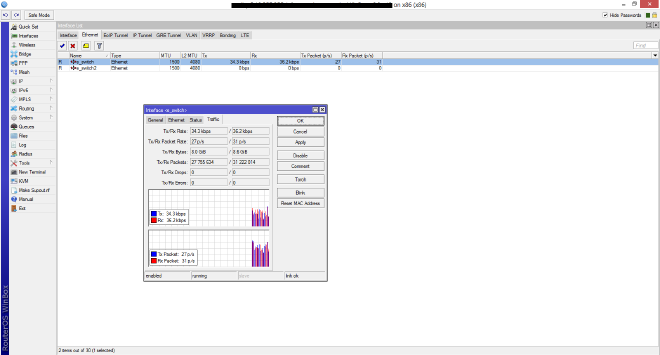
For now I’m going to concentrate on the hardware side of things. When I originally wrote the post there was no requirement for GigE, however this has changed since. I also was using a 24MBit/2.5MBit DSL connection, which has changed now to a 80/20, significantly increasing the bandwidth requirements just from a ISP point of view. With this in mind my RB433 was not going to continue to cut the mustard. This being said, it is still there as my Backup Router, and is able to cope with the Internet side of things during a failover situation. My Primary router is an old(ish) CoreDuo-Mobile MiniITX x86 Board that I had spare. I’m using this now simply as I have a large number of VLans in use, that need to be doing high (1GBit) amounts of throughput between each other, whilst still having ACLs applied. Its worth while noting that with the same levels of inspection going on (Layer 3/Layer 4) this X86 RouterOS machine is able to out preform the medium-high end Cisco ASA-5550 firewall. On a per interface basis there is an average of 80 Rules, and yet it’s still able to cope with 1GBit per interface. There are 3 GigE Interfaces on this device, and I’ve seen upwards of 2.6GBit/s throughput, with CPU being Software

In terms of software. Where to start. RouterOS is superb, there are very few faults from my point of view. If I look at the most important features (from my prespective at least):

CLI #

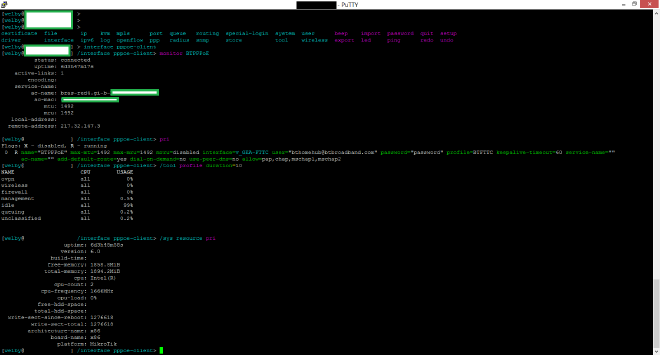
RouterOS has a wonderful CLI. Whilst its not a cisco interface, its not trying to be, which means you can at least let it off for any discrepancies. In terms of access to the CLI it’s avaiable over SSH (prefered!), Telnet, MAC-Telnet (uses a non standard Protocol, IE not IP, IPX etc) or of course trusty Serial.

RouterOS CLI

GUI #

RouterOS has the “WinBox” and “WebBox” gui’s. I’ve got to admit, I’ve never used WebBox, however WinBox is a nice front end to the router.

winbox

Firewall Rules #

Whilst I’ve had one of the people I’ve recommend this to disagree with me on this, I stick by my comparison. Mikrotik Firewall rules are just IPTables. There’s nothing major changed from a generic Linux machines IPTables and the Mikrotik side of things, at least from a management perspective. Creating the rules however, does not require you to memorise the IPTables commandline flags, as mikrotik’s cli/winbox has a different way of doing it. In terms of rule sets, I like to have lots of jumps in my rules, whilst it may not be quite as efficent, it makes it easier (IMO) to manage rules. I’m going to include a very simple firewall rule set (this is NOT what I use)

/ip firewall filter
add action=jump chain=input jump-target=ppp
add action=jump chain=forward jump-target=ppp
add action=jump chain=BTPPPOE_IN comment="Jump to Common Input rules" jump-target=input_common
add action=drop chain=BTPPPOE_IN comment="Drop the BT Vision stuff" dst-address=224.0.0.0/24 protocol=igmp
add chain=BTPPPOE_IN comment="SSH to Bastion (NAT)" connection-state=new dst-address=192.168.0.2 dst-port=22 protocol=tcp
add action=jump chain=BTPPPOE_IN comment="Jump to Drop_and_log" jump-target=DROP_AND_LOG
add chain=input_common comment="Accept established connections" connection-state=established
add chain=input_common comment="Accept related connections" connection-state=related
add action=log chain=input_common comment="Drop invalid connections" connection-state=invalid log-prefix=INVALID
add action=drop chain=input_common comment="Drop invalid connections" connection-state=invalid
add chain=input_common comment="SHHENNNDDD ONE PING ONLY" icmp-options=8 limit=1/1m,0 protocol=icmp
add action=drop chain=input_common comment="SHHENNNDDD ONE PING ONLY" icmp-options=8 protocol=icmp
add action=log chain=DROP_AND_LOG comment="Log everything else"
add action=drop chain=DROP_AND_LOG comment="Drop everything else"

/ip firewall nat
add action=jump chain=srcnat comment="Jumpt to SourceNats" jump-target=SourceNats
add action=masquerade chain=SourceNats comment="Masquerade everything leaving on the BTPPPoE Interface" out-interface=BTPPPoE
add action=jump chain=dstnat comment="Jumpt to Portforwards" jump-target=PortForwards
add action=dst-nat chain=PortForwards comment="SSHd on BTPPPoE to Bastion" dst-port=22 in-interface=BTPPPoE protocol=tcp to-addresses=192.168.0.2

A quick glance over this should give you a quick view of what the rule set does, with potentially the only pitfall being the PPP Jump, this will jump into the ppp chain that is created for any PPP interface.

Crazy Firewall Rules #

Layer 7 inspection is a difficult beast. Whilst RouterOS does NO L7 inspection out of the box (other than some ALGs), it is possible to make your own Layer 7 rules. For example, I want any reverse dns lookup for a specific IP block to be sent to a certain DNS server, irregardless of what DNS server is setup I could do the following

/ip firewall layer7-protocol
add name=DNSL7 regexp=1.1.in-addr.arpa
/ip firewall mangle
add action=mark-connection chain=prerouting disabled=yes dst-port=53 layer7-protocol=DNSL7 new-connection-mark=forwarded-dns protocol=udp
add action=mark-connection chain=prerouting disabled=yes dst-port=53 layer7-protocol=DNSL7 new-connection-mark=forwarded-dns protocol=tcp

/ip firewall nat
add action=dst-nat chain=dstnat comment="Reverse DNS to SERVERXYZ" connection-mark=forwarded-dns to-addresses=1.1.1.2

This would forward any request for reverse DNS for 1.1.x.x to 1.1.1.2.

Wireless #

RouterOS supports 802.11abgn, on 2.4/5GHz depending on the protocol! Security wise, you can have per device WPA2 psks, or use various WPA2 Enterprise authentication methods via Radius

VPNs #

Originally I was using IPSec VPNs everywhere. Whilst IPSec is still my preferred option, it is a little bit of a pain to work with if you have a dynamic IP address, as I do. I’ve moved to using OpenVPN for most Site To Site vpns. RouterOS doesnt support UDP for OpenVPN unfortunately, however this isnt a major issue.

Dynamic Routing #

RIP, RIPNG, OSPF, BGP, HMWP. Chose one! RouterOS supports all. I’m running a VPN between about 10 other peers at the moment, and we’re using BGP to exchange routes between each other. It just works. Some remote peers are Quagga, some Cisco, some RouterOS, all seem to work rather fine.

All in all, I’d recommend RouterOS and the RouterBoard hardware!


iSCSI Target re scanning on VMWare

·59 words·1 min

If you’re using iSCSI on VMWare but have a requirement to rescan the luns after a machine has booted (For example a VM which has DirectPath to a Storage card enabled, which is hosting your iSCSI luns) you can simply do so with the following command

ssh USER@ESXIHOST-- 'esxcli storage core adapter rescan --all && esxcfg-rescan -A' 1>/dev/null 2>/dev/null


F5 LoadBalancing on a per app mountpoint

·471 words·3 mins

With some customers solutions I’ve seen a common requirement to do loadbalancing decision based on the actual application server serving the content, this obviosuly introduces a few issues if you’re using a single base URL for this

If we take the example below

www.example.com/ -> Web Servers
www.example.com/app1 -> App1 Servers
www.example.com/app2 -> App1 Servers

With this in mind, its not possible to use traditional Layer 3 / Layer 4 load balancers, and would require a L7 Load balancer, such as a F5 LTM or Riverbed Stingray (ZTM/ZXTM). I’m going to concentrate on the F5 in this example.

On the F5 you have the abbility to use a iRule to preform load balacning actions. On a Virtal Server that has the “http” profile enabled, you would be able to add a iRule similar to below.

# Name        : Application Loadbalacning Split
# Date        : 19/03/2013
# Purpose     : Split loadbalancing based on application
# Methodology : Change pool based on url

# Set the poolname prefix based on the virtual servers name.
# Pool will always be POOL_$SERVERPOOL
when CLIENT_ACCEPTED {
    if { [virtual] contains "testing" } {
        set serverpool "testing"
    } else {
        set serverpool "liveserver"
    }
}

# Preform a load balancing decision based on the endpoint
# Split the HTTP::path out on '/' and return only the first /<something>/
# This doesn't convert from HEX / Encoded urls, but sends to default pool
when HTTP_REQUEST {
    switch [ lindex [split [string tolower [HTTP::path] ] "/" ]  1 ] {
        "app1" {
            set NEWPOOL "APP1_$serverpool"
        }
        "app2" {
            set NEWPOOL "APP2_$serverpool"
        }
        "default" {
            set NEWPOOL "default_$serverpool"
        }
    }
    pool $NEWPOOL

}

# We add a HTTP Header to identify the app pool that we're going to
when HTTP_RESPONSE {
    HTTP::header insert "X-AP" $NEWPOOL
}

There are multiple events that this will trigger.

  1. CLIENT_ACCEPTED This event is triggered whenever a new connection is made to the Load balancer. In our case the code will check to see if the virtual servers name contains “testing”, which if it does sets the serverpool variable to contain “testing”, otherwise it will set it to “liveserver”

  2. HTTP_REQUEST This event is triggered on any new HTTP Request. In our case this preforms a ‘switch’ (a multiple if/else statement) on the URL. We do however preform two “transformations” on the URL, the first is we convert it to lower case. the second is that we only take the URL between the first two /’s. So for the URL http://www.example.com/app1/test we would use app1 for teh switch statement.
    Based on the path, we will then set the NEWPOOL variable, and then set the pool to NEWPOOL

  3. HTTP_RESPONSE This event is triggered when the server send a response to a HTTP Request. We add the “X-AP” header to the response, and set this to the NEWPOOL variable.


"Instant" Upload to Rackspace CloudFiles

·92 words·1 min

Using inotify and the ‘swift’ client tools it is possible to automatically upload files to cloudfiles as they are written to disk.

This code is untested and might cause planes to drop from the sky, use it at your own risk!

#!/bin/bash
DIRECTORY='/home/welby/'
CONTAINER='testing'
USERNAME="welbycloud"
KEY="APIKEYFORCLOUD"
VERSION="2.0"
inotifywait -mr --format '%w%f' -e close_write $DIRECTORY | while read filename; do
    if [ ! -e "$1" ]; then
       sleep 2
       if [ ! -e "$1" ]; then
           continue
       fi
    fi
    swift upload  -s -A https://auth.api.rackspacecloud.com/v1.0 -U $USERNAME -K $KEY -v $VERSION $CONTAINER $filename 
done